
|
|
Articles
Split the Windows® Desktop: How to Divide a Single Large Desktop into Multiple Smaller Ones
Introduction
Average size and video resolution of computer displays have been strongly increased in recent years. Therefore, desktop workspace has been increased too (especially when using multiple monitors). It allows working with several windows at the same time, and they will not overlap each other. However, to achieve such window allocation without overlapping, you will have to waste the most expensive thing in a work – the time.
That's why Actual Tools offers new decision for this problem for the users of Actual Multiple Monitors and Actual Window Manager – the new feature called Desktop Divider.
Desktop Divider
Desktop Divider allows splitting the desktop area into any number of adjacent non-intersecting zones – tiles. Each tile behaves like a small desktop within its own borders: if you maximize a window within the boundaries of the tile, window will span the tile's area.
As soon as you begin to drag a window, you will see the grid showing the tiles. There are several ways of maximizing a window onto a tile:
Aero Snap feature. Just drag the window to any boundary of the tile.
Standard Maximize button. Window will maximize to the tile, which contains the mouse pointer. To use it, enable the Maximize to Desktop Divider's tile item in the Actions panel of the Mouse page.
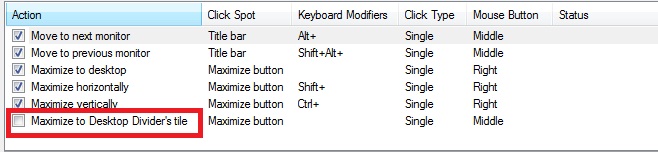
Maximize to Desktop Divider's tile via click on the standard Maximize buttonPut into Divider tile title button. Left-click this button to put the window into the nearest tile (next click will move the window to next tile). Right-click this button to invoke the special Tile Selector window where you immediately select a tile to put the window into. Also, you can select several adjacent tiles to stretch the window up to their combined area: click the left mouse button on the top-left tile of the supposed combined area and drag the mouse to the bottom-right tile holding the left mouse button pressed, then release the mouse button.
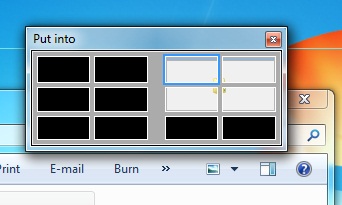
Desktop Divider's Tile Selector windowHotkeys. You can use hotkeys to move the window between tiles in the desired direction.
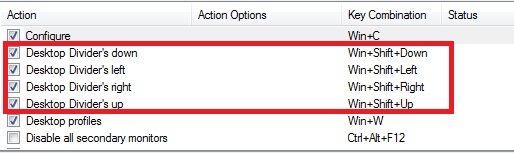
Desktop Divider hotkeys
You can activate or deactivate Desktop Divider as soon as you wish in one of two ways. First, with the Enable Desktop Divider check box in configuration window of the software. And second, selecting the Enable Desktop Divider command in the Windows Desktop's context menu. Desktop Divider can work in one of the following work modes:
Always Active - you can use the Desktop Divider each time you drag or maximize a window.
Active While the Modifier Keys Pressed - hold down the specified modifier keys when dragging a window to activate the Desktop Divider. Once you release the modifier keys, Desktop Divider feature becomes inactive.
Active While the Modifier Keys Not Pressed - same as Always Active but you can temporarily suspend the Desktop Divider by holding down the specified modifier keys. Releasing the modifier keys will activate the Desktop Divider back.
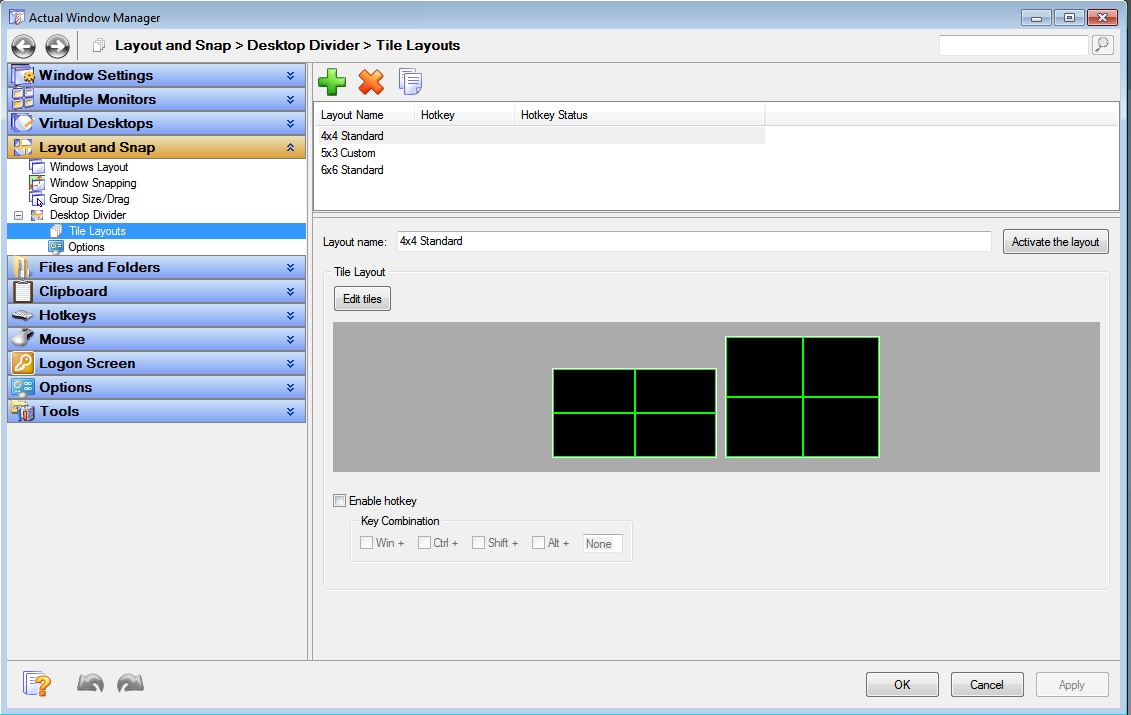
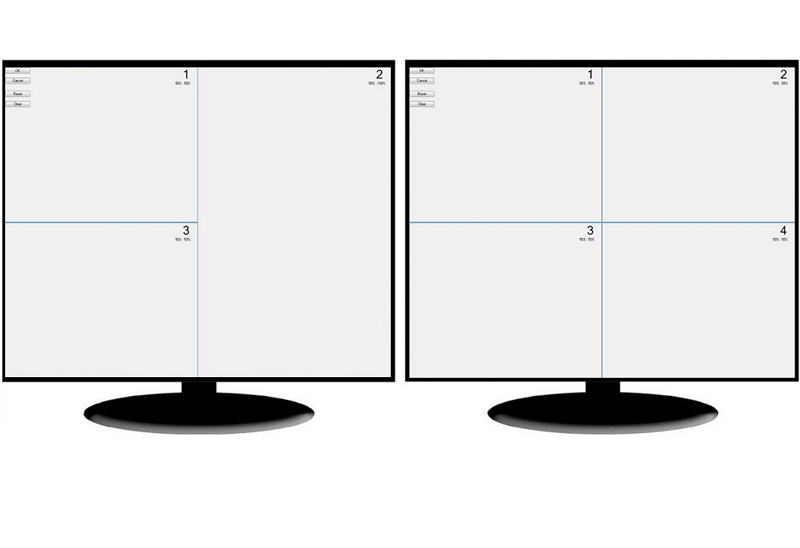
Configuring the Desktop Divider options and layouts
You can create as many tile layouts for your desktop as you need and then switch between them in as the circumstances require: activate the needed layout in the Actual Multiple Monitors Settings dialog using the Activate the Layout button, assign a custom hotkey combination to certain layouts or use the Desktop context menu.
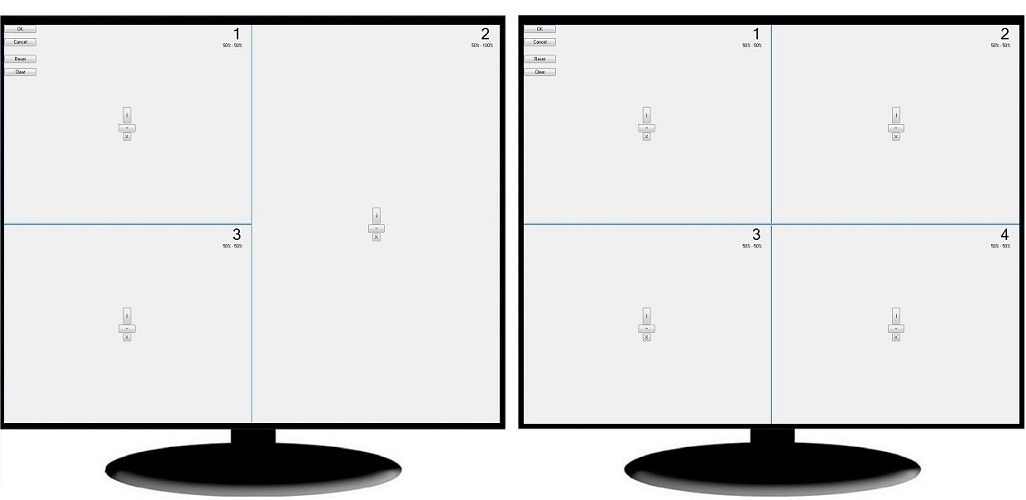
Layout Tiles Editor
3. Conclusion
Save your time and nerves with the new Actual Tools feature – Desktop Divider. Make your work easier and more pleasant.
Useful Links
Window Group Sizing and Dragging — Organize Your Workspace Easily
How to Get New Windows 10 UI Features in Windows 7/8
Desktop Divider: Use Cases
Split the Dual Monitor Desktop in Windows 8


The Most Popular Resources to Download Dual Monitor Wallpapers
Use this article to find cool dual screen wallpapers and personalize your dual monitor desktop.

Minimize to tray: Minimize to the system tray any program you want!
How to minimize any program to the tray!
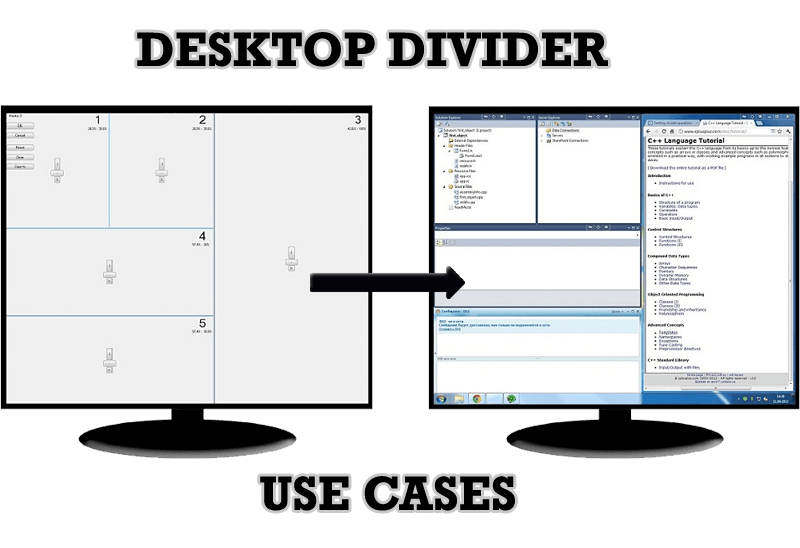
Desktop Divider: Use Cases
Desktop Divider is the new feature of Actual Window Manager and Actual Multiple Monitors. Here you can find some interesting examples of when this feature can be really useful.

Organize your desktop in a neat way!
Split your desktop into well-defined areas to keep your windows in a strict order.

How to Run Windows Store App in a Window on Desktop
New feature in Actual Multiple Monitors transforms Modern/Metro apps to conventional resizable windows on user’s desktop.

How to keep system dialogs Always-on-Top
This article describes how you can stay on top any system dialogs such as 'Add/Remove Programs', 'System Properties', 'Time/Date Properties' and doesn't allow other windows to hide it partially or completely.
-
Find the best way to minimize Outlook Express to the icon in tray
Just one click on Minimize To Tray title button and Outlook Express is minimized to the system tray. Just another click on tray icon and Outlook Express is restored and is ready to use again!
Split the Dual Monitor Desktop in Windows 8
There is a feature, which allows you to split the dual monitor desktop of Windows 8 to several non-intersecting areas for placing windows. This feature called "Desktop Divider".
-
Improve Yahoo Messenger with Actual Title Buttons
Enhance your work with Yahoo Messenger with the help of Actual Title Buttons. Now you can add a whole bag full of new nifty buttons that will make Yahoo Messenger more convenient, stylish and pleasurable to work with.
-
Easy Way to Minimize Windows to the System Tray or to the Desktop
Actual Window Manager provides an additional title button to minimize any window to the system tray in one click.
